
This is the quickest step-by-step guide to configure MadMax with Space Pool using portable plots using this guide you would be able to mine Chia XCH coin even in 2024. We have mentioned the steps below that you should follow:
- Install latest Chia Blockchain Version
- Sync Your Chia Wallet
- Get free mojo from official Chia faucet
- Join a pool
- Install MadMax Plotter
- Check directories in the Chia GUI
There’s been so much talk about the NFT and non-NFT plots and installing . NFT plots are also called portable or poolable plots. NFT plots are the new form of the plots that use the -c argument during plotting and are tied to a plot-NFT, which can be used for solo farming, or joining them to a pool. These are the “portable” plots.
The NFT or portable plots are not interchangeable because the NFT is added during the creation. However, in this post we are going to discuss how to utilize the Mad Max plotter for windows with the new NFT or singletons because there is so much useful information about it that you need to understand.
Install latest Chia Blockchain Version
- The first thing you need to do is to go and download chia blockchain latest version 1.2.+ from https://www.chia.net/download/
- Click install and install it
- The next thing it’s going to ask you to create a wallet if you have not.
- Sync the full node with the database or wait for it to sync

- Then once you log in it’s going to be trying to sync with the database and the blockchain. copy the DB file from C:\Users\Goose\.chia\mainnet\db to your new install

- This can take up to two days for it to sink
If you are installing for the first time then you are going to have to wait for that to be synced. While if you have an existing chia latest version already installed and synced you can go ahead and take that from the database file which is in users your username.chia-mainnet-db and copy it into the folder of your new installation. It will automatically be synced so you don’t have to wait for it to be synced if you have it installed already.
Sync Your Chia Wallet
- The next thing you need to do is you need to make sure that the wallet is synced. This takes probably another day or even more for some people.
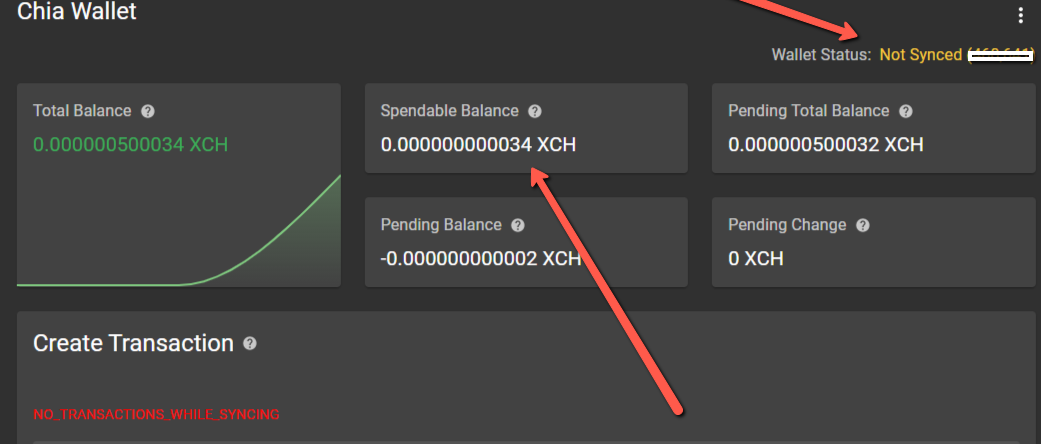
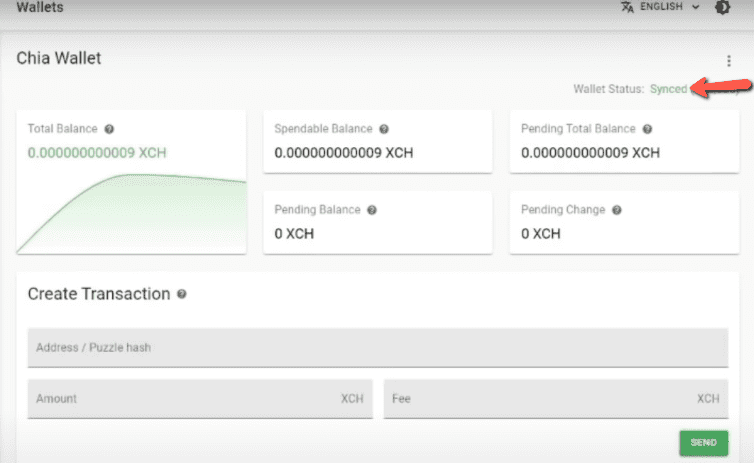
- It takes a while you have to make sure that both the wallet is synced and your full node is synced before you proceed.
Get free mojo from official Chia faucet
- Once all that is done. The next step you need to do is to join a pool.
- The only way you can join a pool is you need to get some chia into your wallet.
- You need about .0000005 more or so Chia or mojo. You can claim that from a faucet.
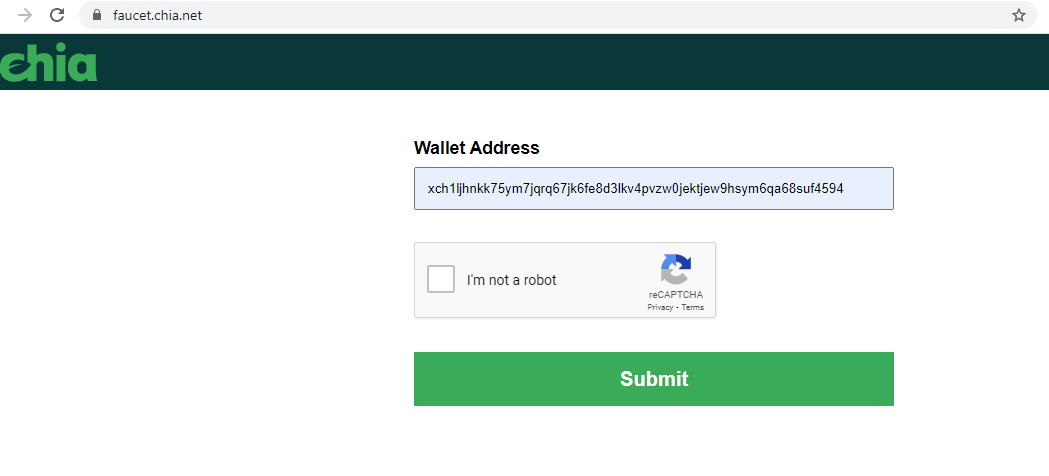
- Go to a faucet website like the official Chia faucet’s https://faucet.chia.net/. Click I am not a robot
- Then paste in your wallet address
- Submit it will then send you XCH0.0001
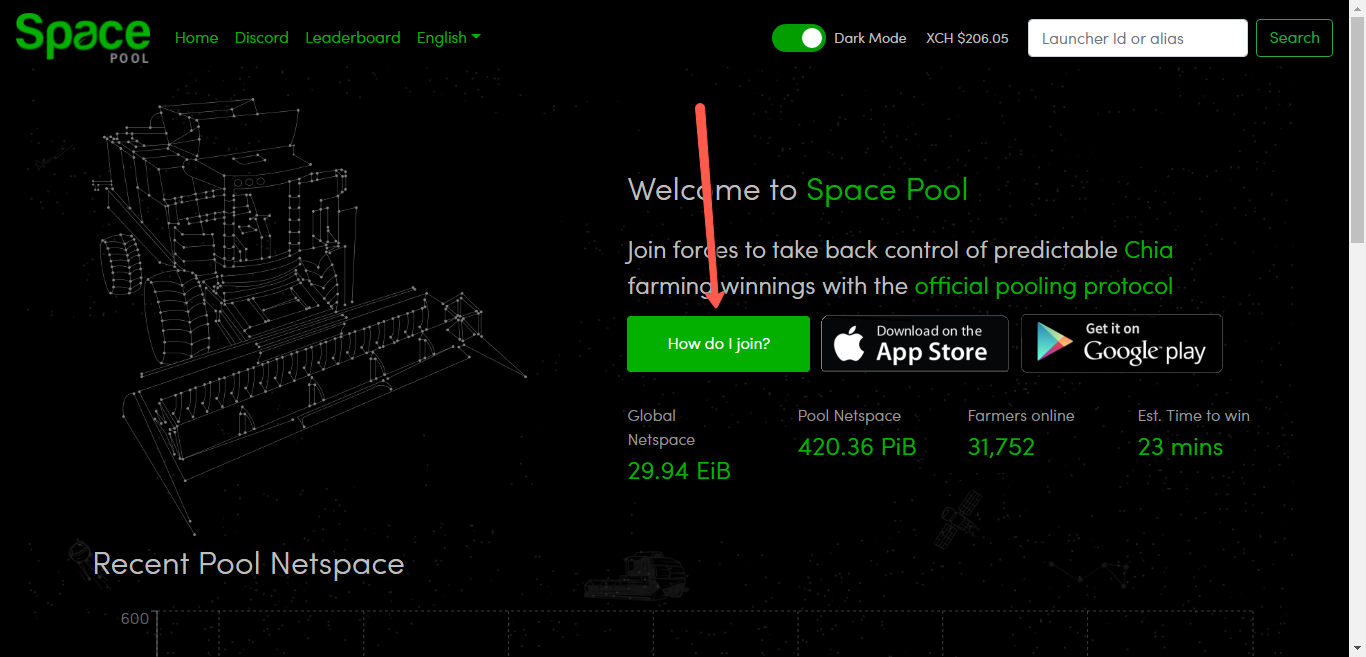
Join the space pool or any other pool
The next step you have to do is to select a pool. You can join Space, Huobi or any other pool you want to join.
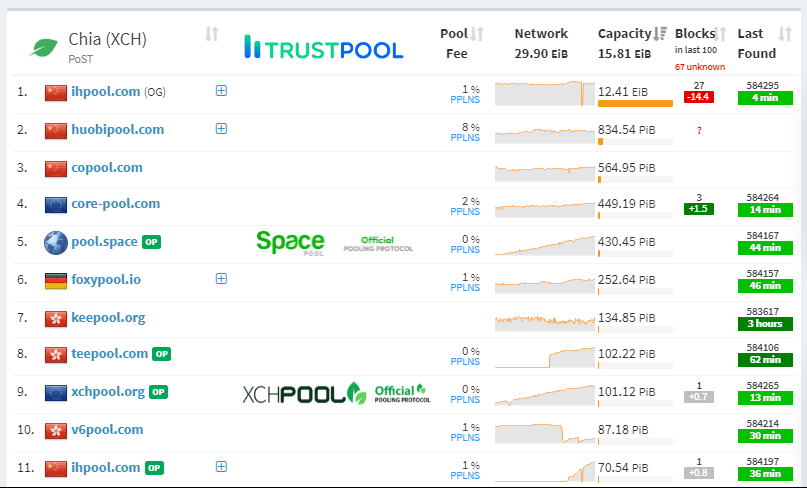
- There is a list of the pools available at https://miningpoolstats.stream/chia you can select which pool you want to join. Some of them are not following the official Chia pooling protocol so it’s better if you are joining the space pool etc.
- Then navigate to the website of the pool of your choice
- Click on ‘How do I join.’ Most of them will be similar.
- Scroll down to the bottom and there’s going to be 3 or 4 Geolocation URLs.
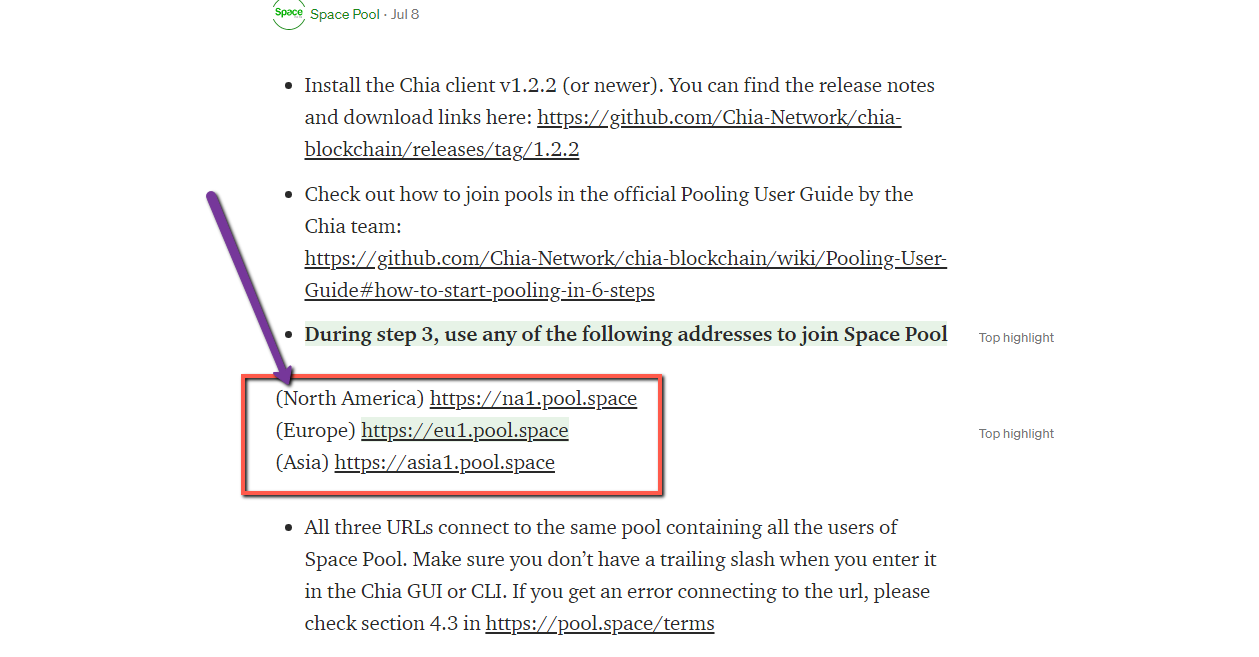
- Select your your URL North America and copy it
- Go back to your GUI. Click on pool.
- Click add a pool
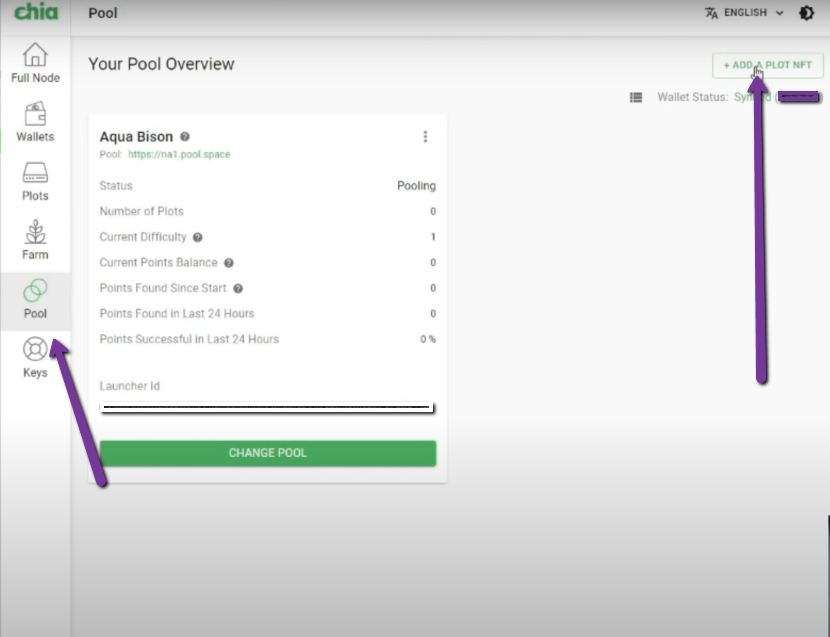
- Click connect to a pool and paste
- Click create
Once that’s created. It will take a few minutes to sync.
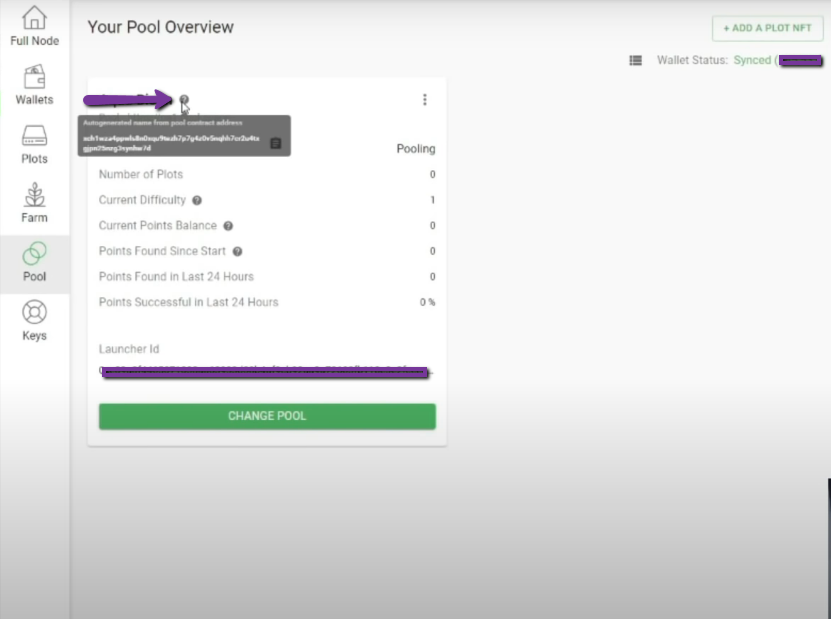
Once that has been synced. It will show your name here. That’s what going to give you your contract address as shown in the image below which we are gonna be using a little bit later.
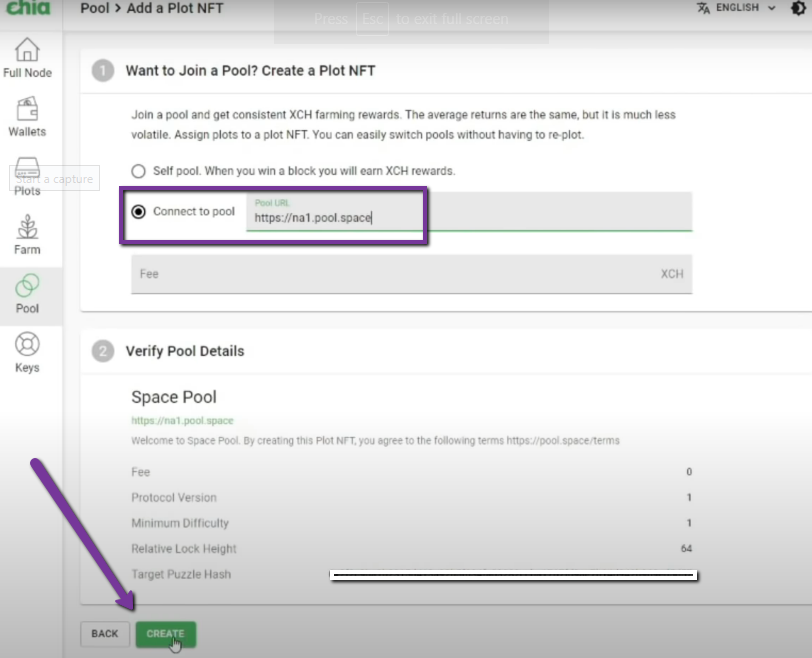
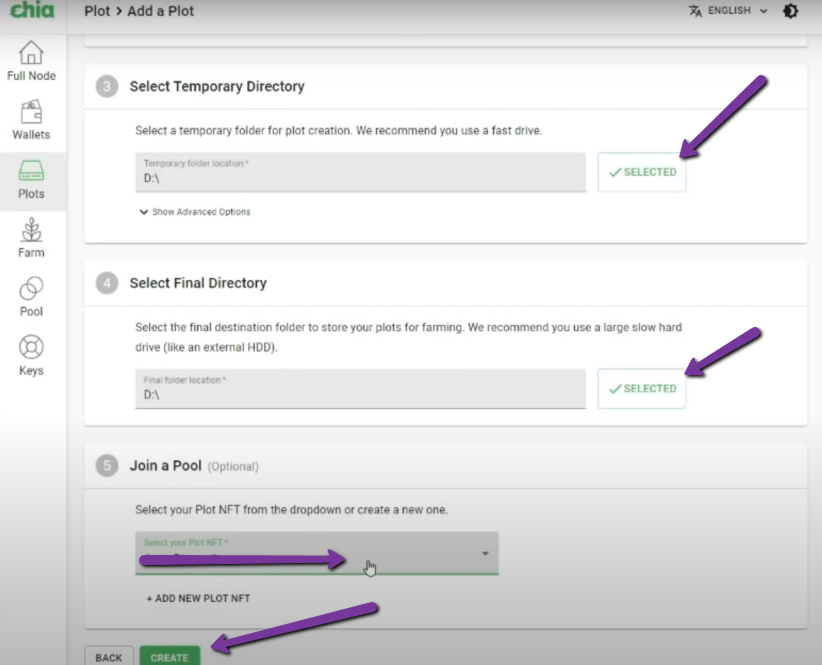
Now you can go ahead and click plots NFT you want to add. Click add a plot NFT. As shown in the images below.
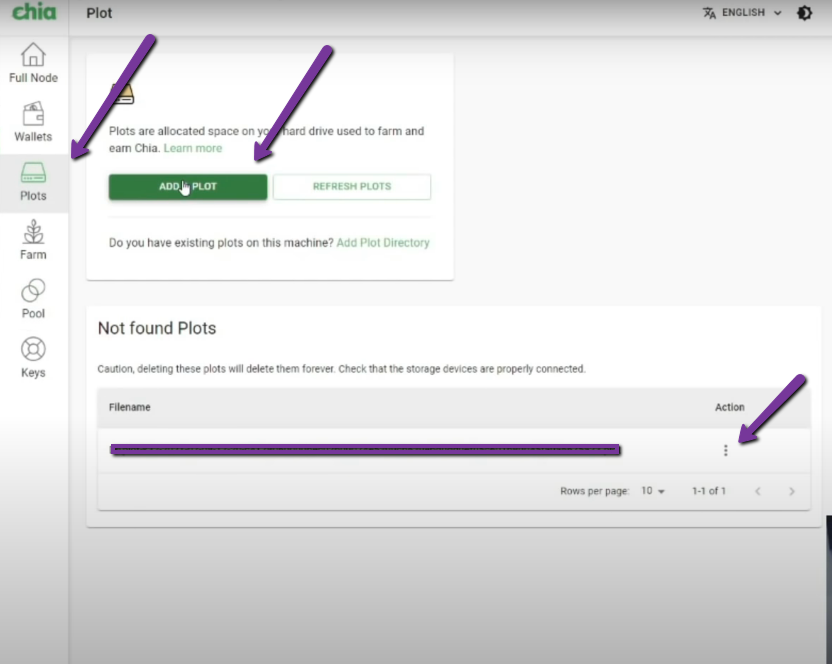
Then click the D:/ or any drive for the temporary and final directory. Then select the pool and finally click create.
Then it will start plotting with the space pool, Huobi or any other pool you have joined on it.
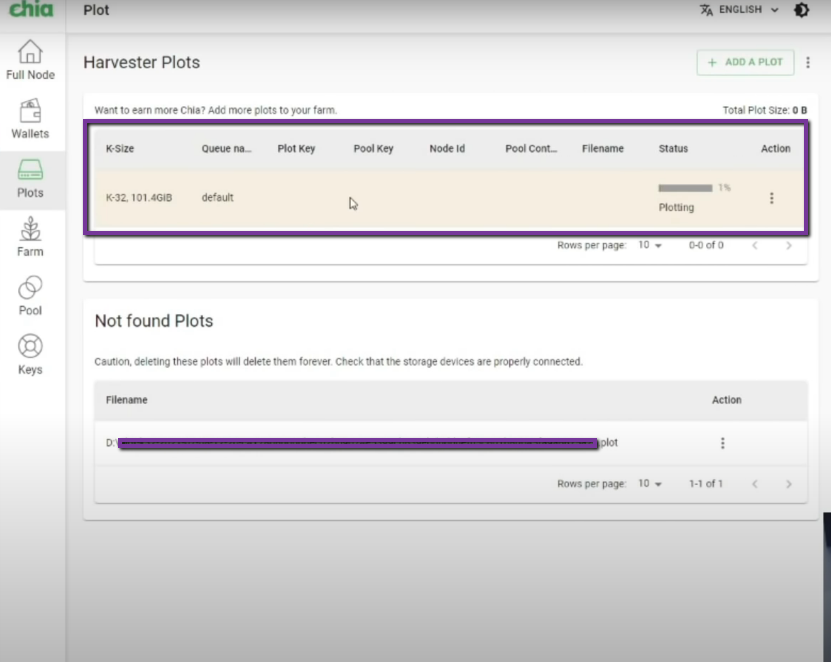
You can take a look at the process by clicking the view log. That would also show your pool contract address.
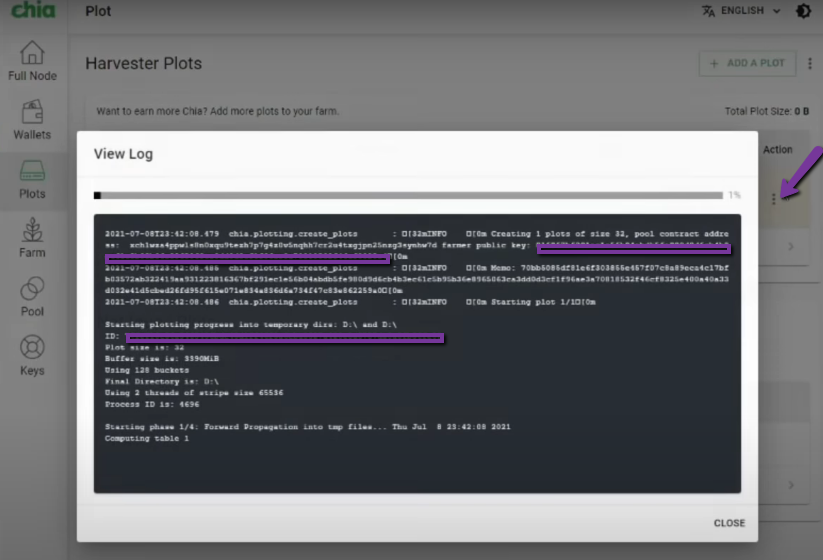
so this is one of the addresses that you are going to need in order to use MadMax which we suggest you use. So now that is plotting against a pool.
Installing MadMax Plotter Quick Guide
- Go download madmax: https://github.com/stotiks/chia-plott…
- Extract to c:\madmax
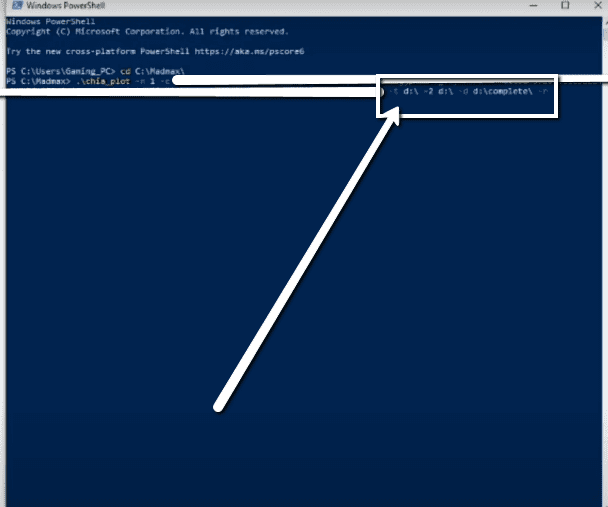
- Open Powershell window and navigate to c:\madmax
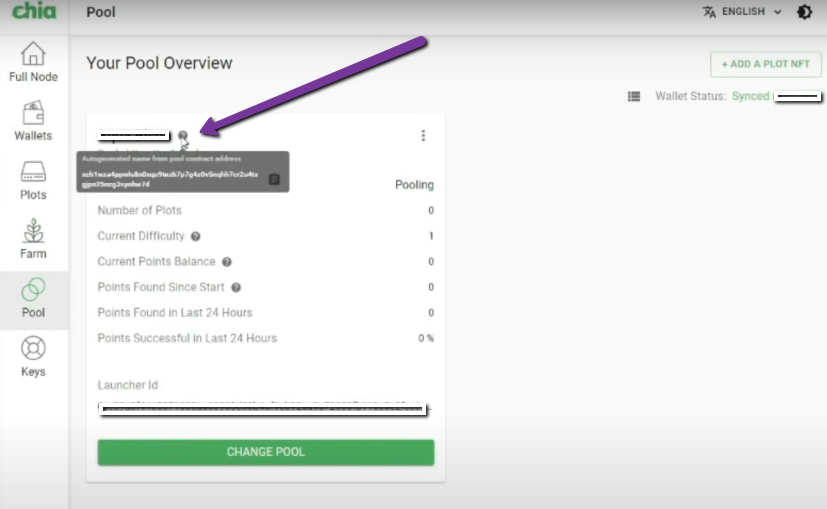
- Get your contract address: Gui – select pool and hover on “?” –copy the contract address to your notepad
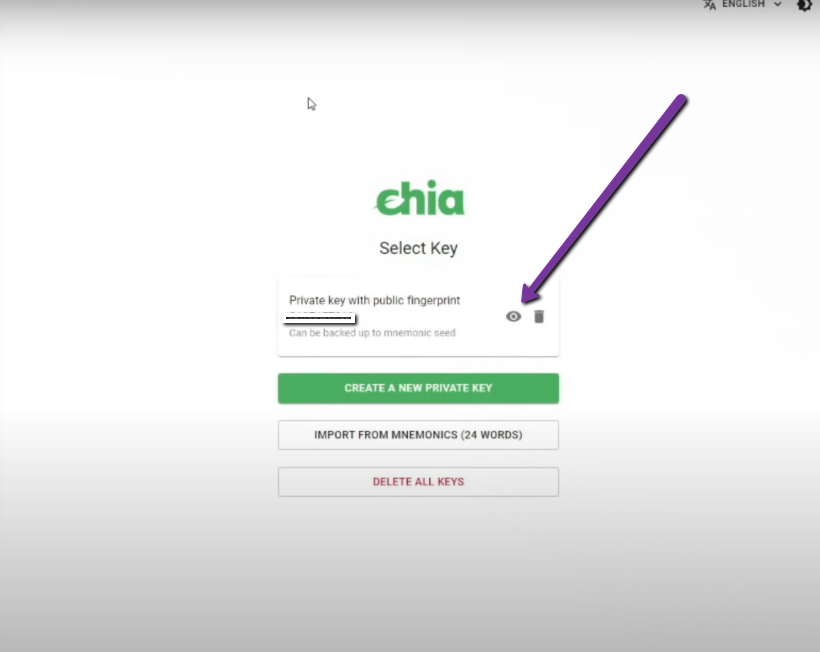
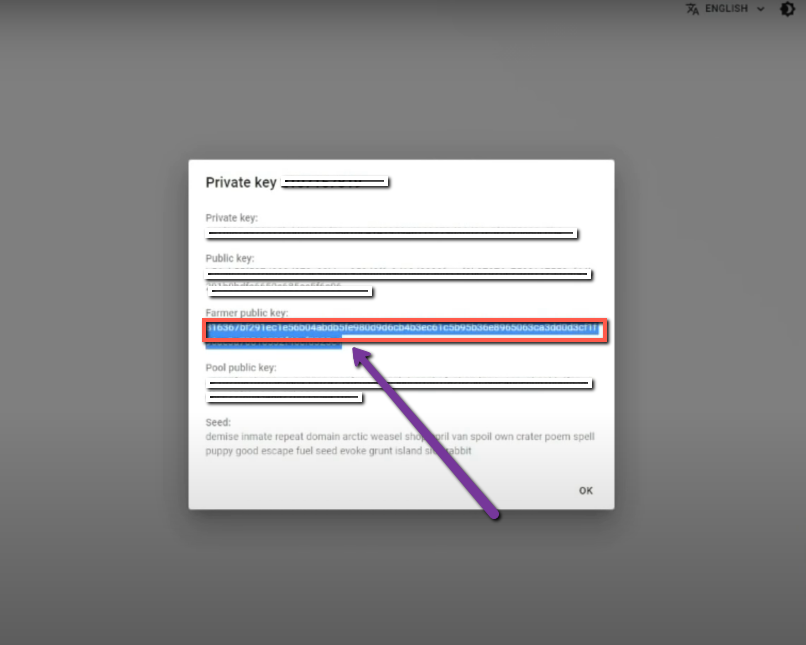
- Copy your farmer pool key, Gui – keys and select “View” and copy the farmer public key
- Paste both in Win powershell Madmax string:
Example:
.\chia_plot -n 1 -c [contract_ID] -f [Farmer key] -t d:\ -2 d:\ -d d:\complete\ -r 8 -u 256
Installing MadMax Plotter – Detailed Guide
The next thing you need to do is to go and download Mad Max plotter. You should download the latest version of Mad Max plotter if there’s been any update. Then select the windows zip and extract that into C:/ drive Mad Max.
Now you need to go to C:\ drive Mad Max and that’s where you are going to be having everything executed. Once it’s installed all you have to do is type power shell into windows, navigate to C:\MadMax\

Once you are in the directory of MadMax the first thing you are going to need to get your contract address. Click on the chia GUI you need to click on pool, hover over to “?” icon and copy the contract address to the clipboard. That’s your contract address. Then take that contract address and paste it into a notepad next to -C.
The second thing you need is your farmer pool key. Go back to Chia GUI, click keys, click view it’s going to pull up all of your keys as shown in the pictures below. Then copy the farmer public key go back to the notepad. Press “-f” space and then paste in that farmer public key that is all you need from the Chia Gui at the moment.
After that you need to type your first plotting for Mad Max “PS C:\Madmax> .\chia_plot space _n 1” this is the number of plots that you want. You can type “-1 instead of 1” it means that it’ll go forever or in your case you are just going to hit “1” that means you only want 1 plot.

Then you need to paste in your contract address. Since you have already copied that you need to just paste, right click space then next you need to put your farmer pool address, copy it from the notepad where you stored it right click space to paste it in the powershell.

Then add your temporary directory “1” which is “-t” in your case. You are going to use
- D:\ drive for temporary directory “1”
- Then the second temporary directory “2” you need to use the same drive just because that’s what we have done in the above example. It’s kept as simple as basic.
- -d destination drive – The next you need to find the destination drive which is going to be in the “d:\complete”
- The next thing you need to add “space -r”
- The next thing you to add is the number of threads of your computer.
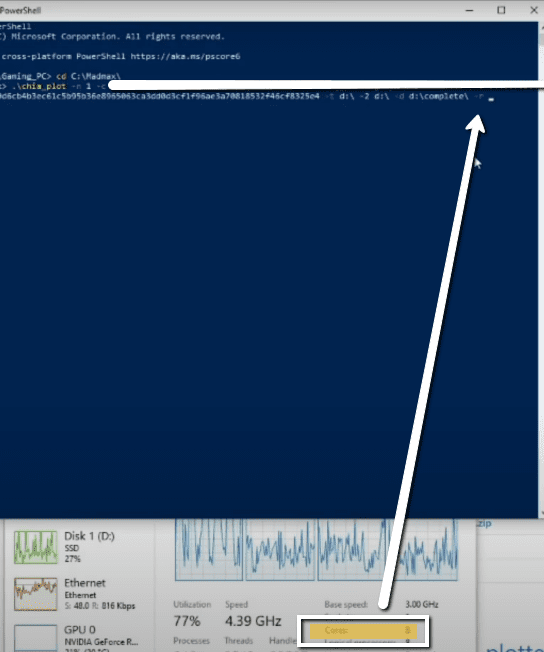

- Click on Task Manager, check the cores you are going to use add them.
- Then hit “space -u” 256. Where “-u” is for buckets and 256 is the default. You can change that to like 128 or 512. Whereas the 256 seems is the consensus then hit “Enter.”
- It’ll start to plot immediately once you hit enter
Check directories in the Chia GUI
Now you have everything you need. It’ll go to the D:\ drive complete the last thing. You need to check in Chia as you need to make sure that the chia has your plot directory.
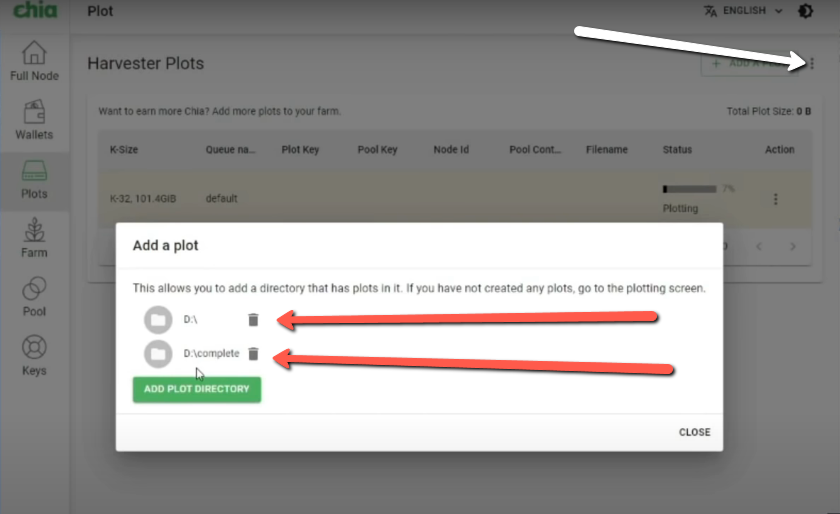
- Open Chia GUI
- Click plots
- Click on 3 dots
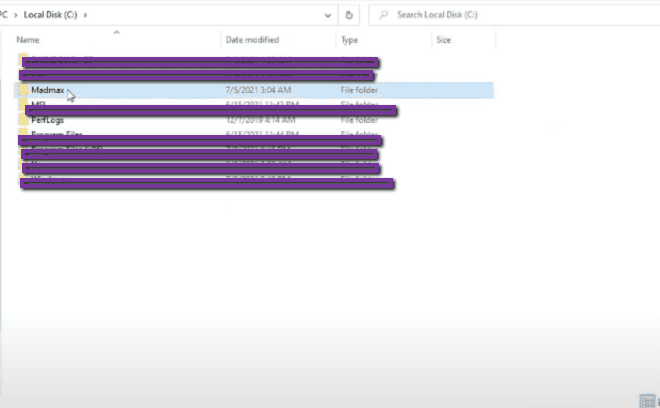
- Click add plot directory and make sure that Your “d:\complete” is in the plot directory as shown in the above image. Otherwise it won’t pick it up.
You can see how quick was the procedure to install Chia, pool plot and configure MadMax. Once you get plots generated into your location it will show you have 1 plot in the space or any other respective pool. This was it, you have learn how to quickly install everything and install farming pools with MadMax.


Thx for help, all work fine