There are many messaging apps in which, while conversing with your friends and family, you can add stickers in your conversation. These stickers are small drawings that show some emotion or action through animation in your messages. These stickers are used to create fun and for people to enjoy them. In the present era adding stickers to your conversations has become the trend and nearly all the apps used for messaging support their use.
Telegram is a messaging app that is quite popular and offers very good security to its users. The app is quite unique in the sense that it allows you to upload and create your own stickers which you can use in the conversations. This app will allow you to make your own sticker packs that you can use in your chats and amuse others.
Through its different channels, Telegram will give you different sticker packs, and here you are able to download and install the stickers. After these sticker packs are installed they mix up in such a way in your telegram app that they will look as if they along with the rest of the emojis, are an in-built option. So that now you can easily add them to the messages.
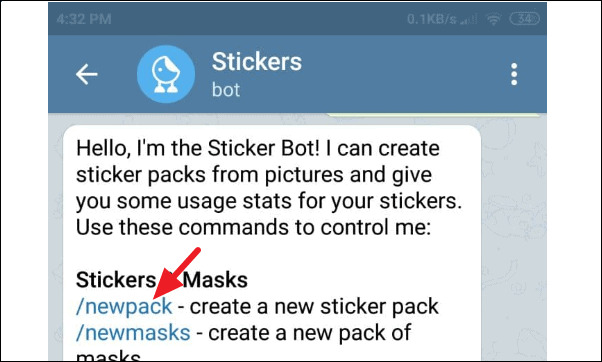
In addition to this, you can install a sticker bot to your app, and with its help Telegram will allow you to make your own Sticker Packs. So now you will be shown how to create your own stickers and share them with your family and friends.
Requirements For Creating Stickers on Telegram:
The first step is to create a Telegram account and after that, you will need some images in PNG format. But it’s really important that the measurements of the image should be 512 x 512 pixels and that it should come with a background that is transparent.
Preparing the Image for Stickers
In order to create quite a stir in your competitors and to show your creativity, you have to make some really cool stickers, and to achieve this the first thing is to remove and change the background of the image. Here the eraser tool will come in handy in the editing of the image that you prefer. And another option is to use the tools that are available online such as remove.bg. These tools can be used to remove the background of the images.
The next step is to crop the original image according to the required measurements of 512 x 512 pixels square. After doing this you have to save the image in 512KB size. Here you can take the help of some image compression tool if you are unable to reduce the size yourself.
After you have named the sticker pack the bot will ask for the image file to be sent. You have to send the image file in PNG or WEBP format and it should be covered with a transparent film. To fit into the format the image should come with the measurements of 512 x 512 square. Next, you have to tap on the ‘attach’ icon, choose the images from the gallery and add them to the image files. While uploading the images it is better to use the Desktop Telegram app.
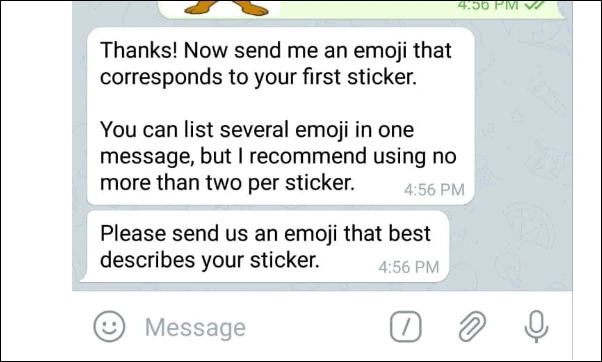
In the next step, the bot will send the command to you to send an emoji that would best explain the type of sticker pack you have made. This emoji will have a link with your sticker. There are sites like ‘What Emoji’ or Emojipedia’ where you can find the meanings of emojis given in great detail.
It is up to you how many emojis you want to add to your conversation but it is suggested that it’s always better to use one or two emojis. So that whenever you use that particular emoji, you will get a suggestion to send the sticker which is linked with it.
After sending the emoji you will only start using it after you have published the sticker pack. For publishing the sticker pack you have to click on the /publish command.

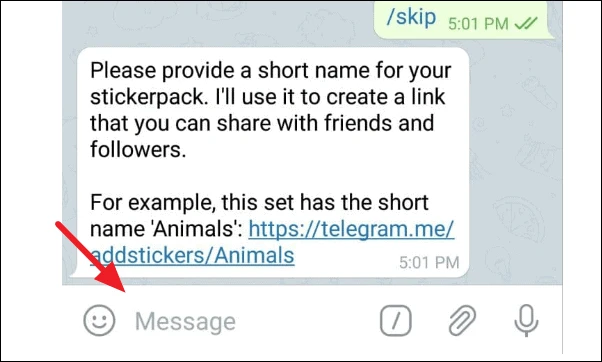
To have an icon for your sticker pack the bot will ask you to send an image with 100 x 100 measurements. There are two methods to do this, either you can click on /skip or you can let the bot do the work. The bot will pick up the first sticker from the sticker pack and set it as the icon.
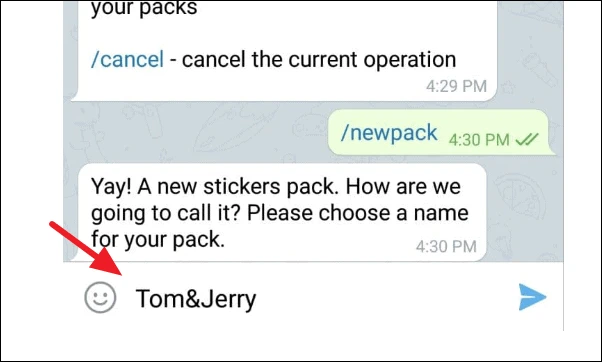
Now you have to give a short name to your sticker pack, one that could be easily remembered and be user-friendly. The bot will use this name to create a link from where you can share these stickers on different apps.
After this, you will get a confirmation message telling you that your pack has been published. Now the bot will send you a link also which can be used by you to include your sticker pack in your account. Now you will be able to share your sticker pack and send it to anyone you want to.
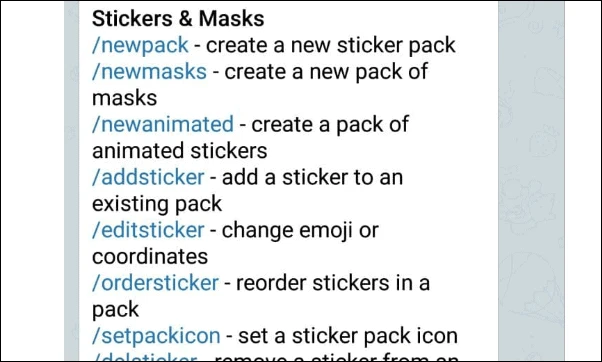
And the good thing here is that you will be given the option of canceling your process anytime you want to do so. For canceling the process you will have the /cancel command in the app. After this, a message will come along with some commands. You can use these commands to further customize your pack or to carry out any other functions of creating. deleting or editing.
So here we end hoping that our tutorial has helped you. Now anyone to whom you have sent your pack and link can use these stickers and enjoy them.